Our site uses cookies to give you the best experience. or continue shopping if you're happy.
Accept & closeClassic Coffee & Walnut Cake
A go-to recipe for coffee lovers. Or cake lovers. And with the right kit, it couldn't be easier.

Difficulty
Easy
Serves
8-10 people
Prep Time
15 minutes
Cooking Time
25-30 minutes
"With the Bake Off back on our screens it’s time to dust off our aprons and cake tins and get baking! This simple coffee cake is easy to make in a food processor but tastes totally delicious and will wow any coffee lover. For an impressive finish, invest in a decorating turntable stand and a set of pattern scrapers."
Here's what you'll need for the cake...
- 165g plain flour
- 165g soft brown sugar
- 80g walnuts (50g used in the cake the rest for decoration)
- 1 tbsp instant espresso powder
- 1/2 tbsp baking powder
- 1/2 tsp bicarbonate of soda
- 1/4 tsp salt
- 100g cold unsalted butter, cubed
- 2 large eggs
- 100ml whole milk
- 1 tsp vanilla paste
- a little butter and flour to grease the cake tins
- handful walnuts halves to decorate
...and for the coffee buttercream...
- 500g icing sugar
- 160g butter at room temperature
- 50ml double cream
- 2-3 tbsp instant espresso powder
- a little hot water
Here's how it's done... Step 1
Preheat the oven to 180C. Grease 2x18cm (7in) cake tins and line the bottoms with baking paper. Grease the paper and dust with flour tapping out any excess.
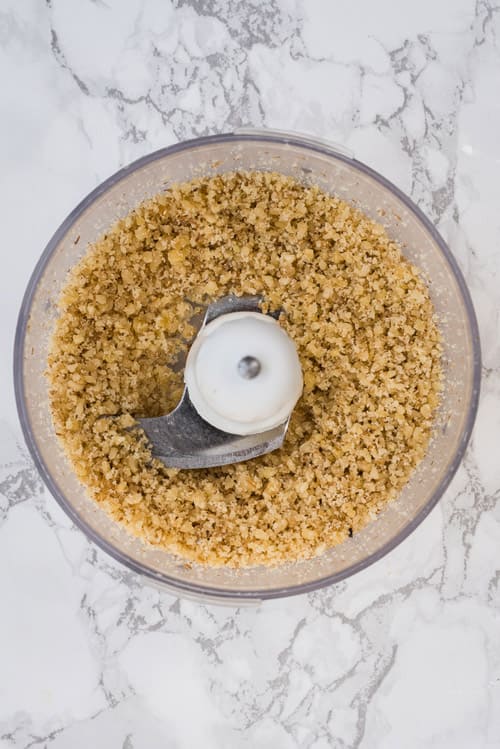
Put the walnuts in a mini food chopper and pulse until finely ground.
Step 2
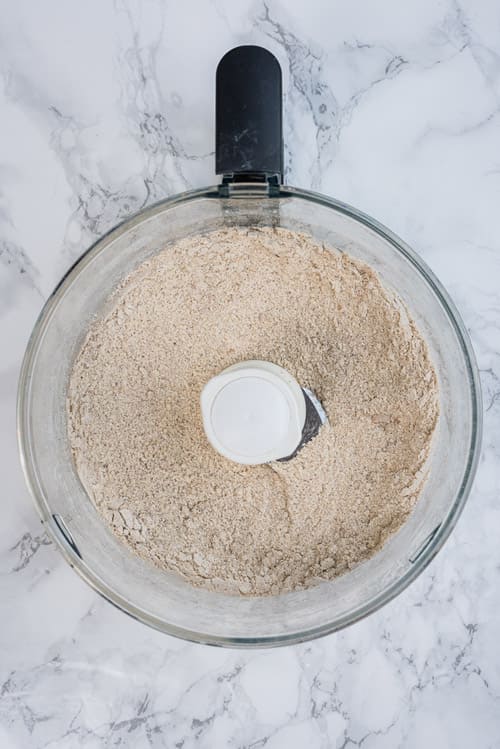
Add the flour, sugar, 50g of the ground walnuts (reserve the rest), coffee powder, baking powder, bicarbonate of soda and salt into a food processor fitted with a metal blade. Pulse until the ingredients are mixed.
Step 3
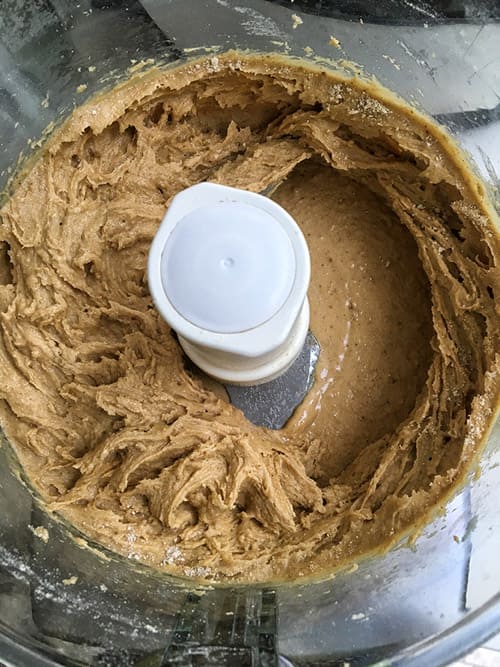
Add the cubed butter and pulse until the mixture resembles breadcrumbs.
Add the eggs and pulse again until mixed in.

Step 4
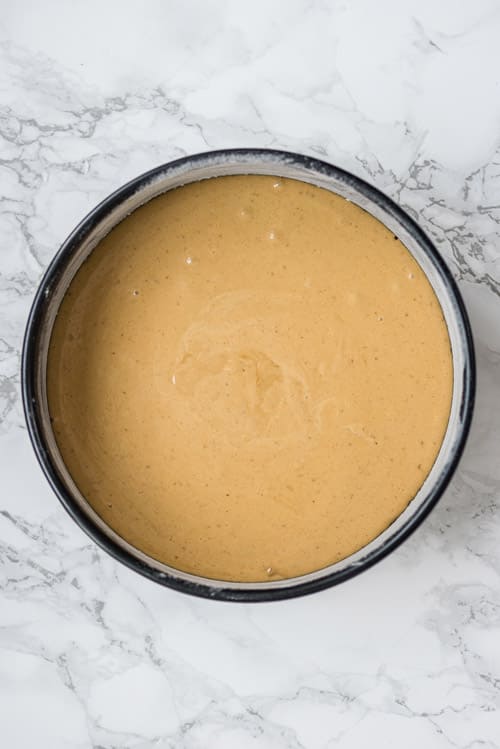
Add the milk and vanilla paste and process for 2-3 minutes until the batter is smooth. You may need to scrape the sides of the bowl with a silicone spatula to make sure everything is well mixed.
Step 5
Divide the batter into the prepared tins and bake for 25-30 minutes. The cakes are ready when springy to the touch and a skewer inserted in the centre comes out clean.
Cool on a wire rack and then gently turn the cakes out of the tins. Leave them to cool completely before frosting.
Step 6
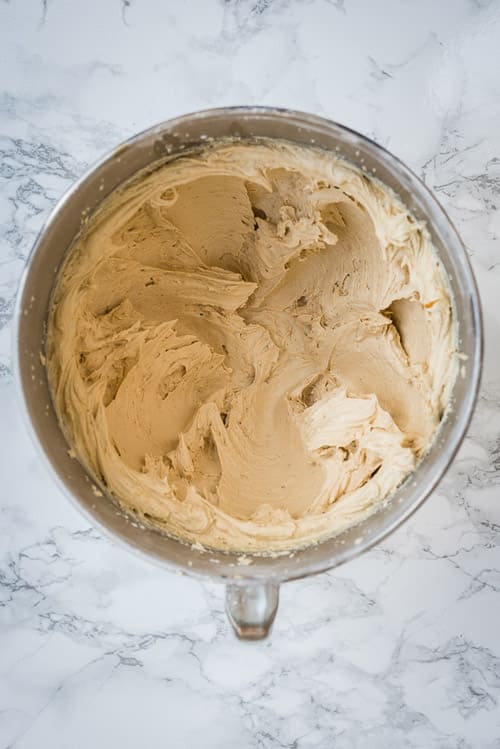
Put the icing sugar, butter and coffee in the bowl of your stand mixer fitted with the paddle blade.

Step 7
Start mixing to gather on the lowest speed setting, gradually adding a little hot water to avoid an icing sugar snow storm!
Once the ingredients are roughly combined, increase to the maximum speed setting and mix together for 4-5 minutes until frosting is light and fluffy.
Add the double cream and continue to beat together until incorporated.
Step 8
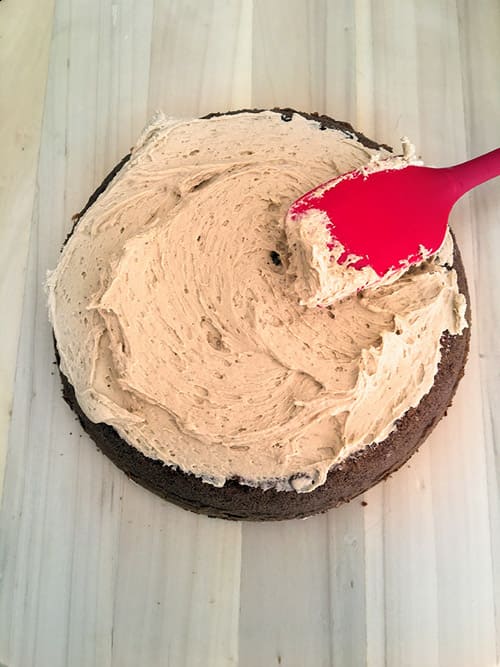
Place the bottom cake layer on a plate and add a generous layer of frosting. Sandwich together with the second layer and cover the entire cake with a thin layer of frosting – this is your crumb coating and doesn’t need to be neat. Chill the cake in the freezer for 20 minutes.
Step 9
Add a generous layer of frosting over the sides of the cake and use a cake pattern scraper (also called an icing comb) pressed parallel to the side of the cake gently pressing the edge of the scraper into the icing to create the pattern. This is best achieved on a turntable stand.
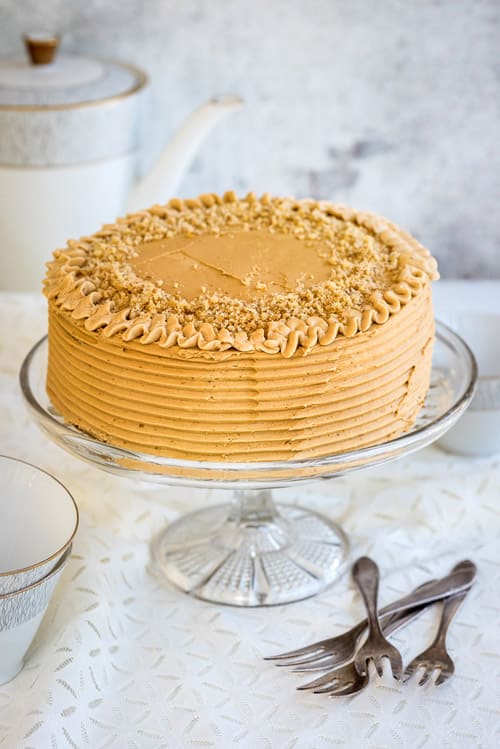
Step 10
Put the remaining buttercream into a small piping bag and pipe a pattern around the perimeter of the cake. Sprinkle with the remaining ground walnuts, add a few walnut halves as decoration and enjoy.