Our site uses cookies to give you the best experience. or continue shopping if you're happy.
Accept & closeMake Your Own Gift Bag
Save money and create something personal with our DIY Gift Bag tutorial!

"Recently when I’ve been buying presents for friends and family I’ve noticed how expensive paper gift bags seem to have become. Has anyone else noticed this?! Maybe it’s just my thrifty mind taking over, but it occurred to me that it is actually quite simple and cheap to make these yourself. Obviously it takes more time than popping into your local gift shop and buying a ready made one, BUT you will have that added personal touch and you can customise the bag to the right size for your gift – another problem I find I’m often faced with!"
Here's what you'll need...
- Thin card (approx 160-200gsm) – either A4 or bigger
- Wrapping paper
- Fabric or ribbon
- Craft glue
- Hole punch
- Ruler
- Paper scissors
- Pinking shears (if making the handles from fabric)
Here's how it's done... Step 1
The bag I’ve made is 13cm x 13xcm x 7cm so I will give measurements for this, but you can obviously alter these for larger or smaller bags.
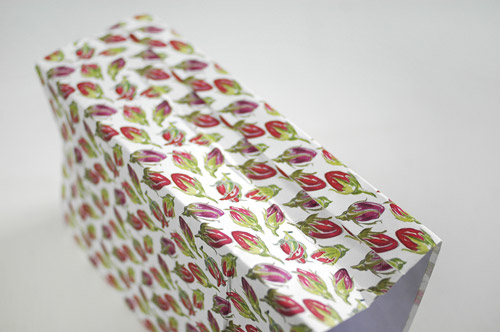
First measure out the card – you will need one piece 41cm x 21cm. If you are using A4 card cut 2 pieces 21cm x 21cm and glue the edge together with an overlap of 1cm. Using this as a template, cut out the same size from your wrapping paper, and glue this to your card. It should now feel quite sturdy.

Step 2
While you are waiting for the glue to dry, you can measure out where your folds will be. Follow the sketch below using a ruler to make light pencil lines.
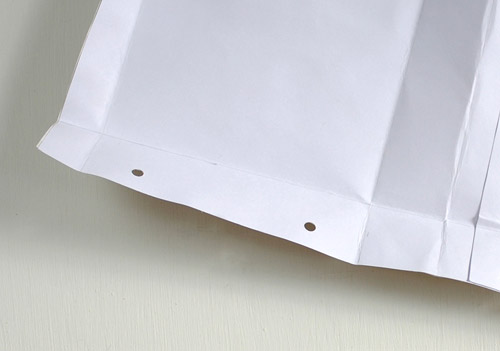
Once your glue is dried properly, start making the folds along your pencil lines, make sure your folds are nice and sharp. Open out, and punch holes in the two sections along the top side of your bag.
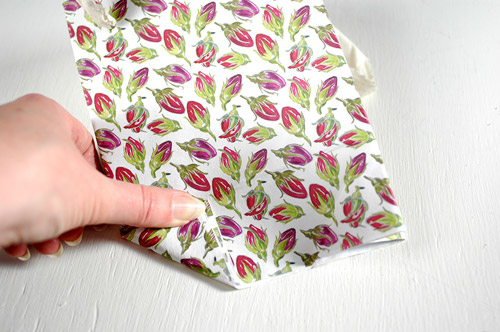
Step 3
Next fold your bag into a tube shape, gluing the two edges together. Fold in the top piece of the bag (where you’ve just punched the holes) you will now need to make more holes in the same places so they go right though the bag. I did this with a pencil as my hole punch did not reach.
Step 4
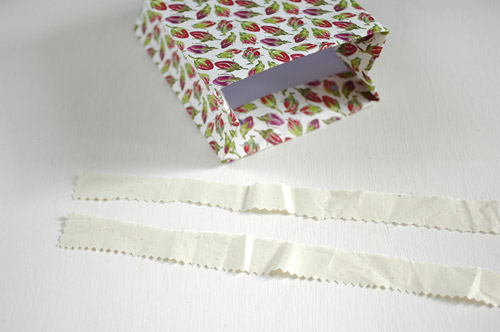
Cut strips of fabric (or ribbon) approx 25cm long using pinking shears to avoid fraying. Feed these through from the outside of your bag to the inside and tie knots in the ends of the fabric strips to hold in place.
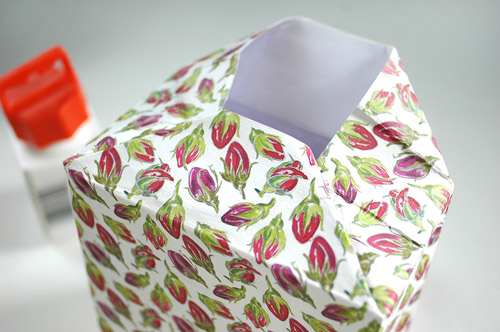
Step 5
Now you need to create the base to your bag. Firstly, fold your bag completely flat (the sides should fold inwards from your earlier folding) Press both corners in one way and then fold the other way to make the fold nice and flexible.
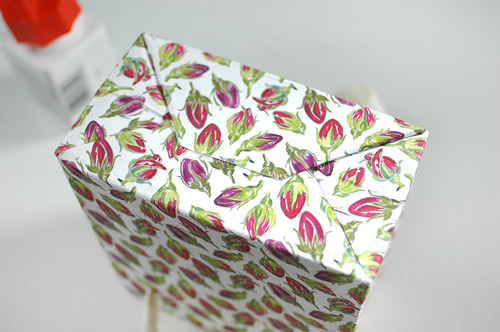
Step 6
Open out the bag again, and then fold two of the corners in, and the flap will then fold down, glue these.
Step 7
Do the same with the other side and glue. The base of your bag is now closed.
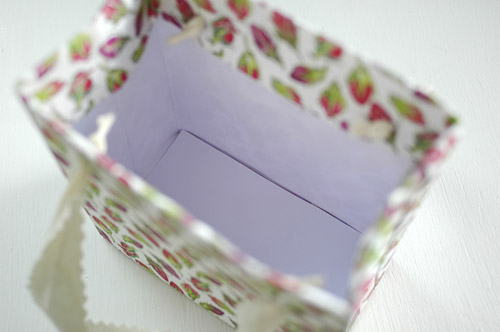
Step 8
Finally measure out a rectangle of card to the dimensions of the base of your bag.
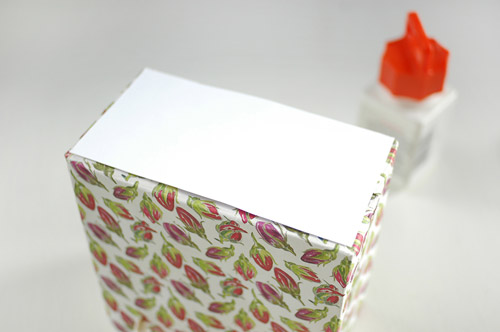
Glue this to the bottom of the inside of your bag to make it nice and neat.
It may seem a little complicated at first, a little bit like origami! But once you know what you are folding and where, it is quite simple, and looks just as professional as any shop bought gift bag!