Our site uses cookies to give you the best experience. or continue shopping if you're happy.
Accept & closeChocolate Chicks
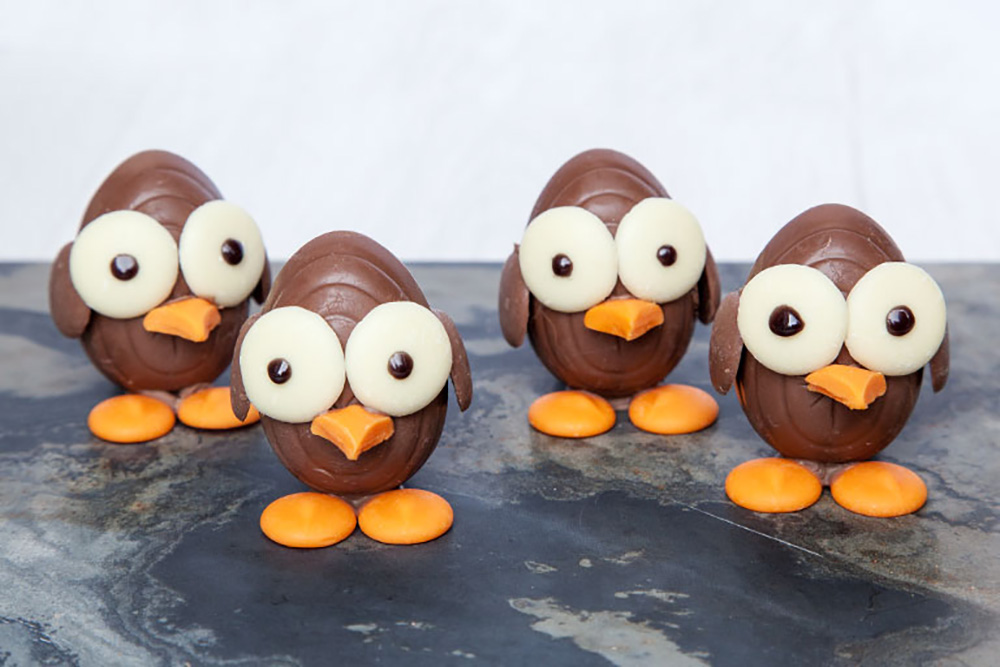
Give these cute chocolate chicks a go over Easter!

Difficulty
Easy
Serves
5
Prep Time
30 minutes
Cooking Time
N/A
"Baby chicks, eggs, and chocolate. All things kids immediately associate with Easter, so this recipe takes all three and combines them into these hugely characterful little guys.
Why not give these cute chicks a go? They’re easy to make with the kids, use easy to source supermarket ingredients and, best of all, they’re completely edible."
Here's what you'll need...
5 chocolate eggs
1 pack of orange chocolate buttons (from the baking aisle)
6 squares of milk chocolate
2 packs of white chocolate buttons
2 packs of milk chocolate buttons
1 black writing icing pen
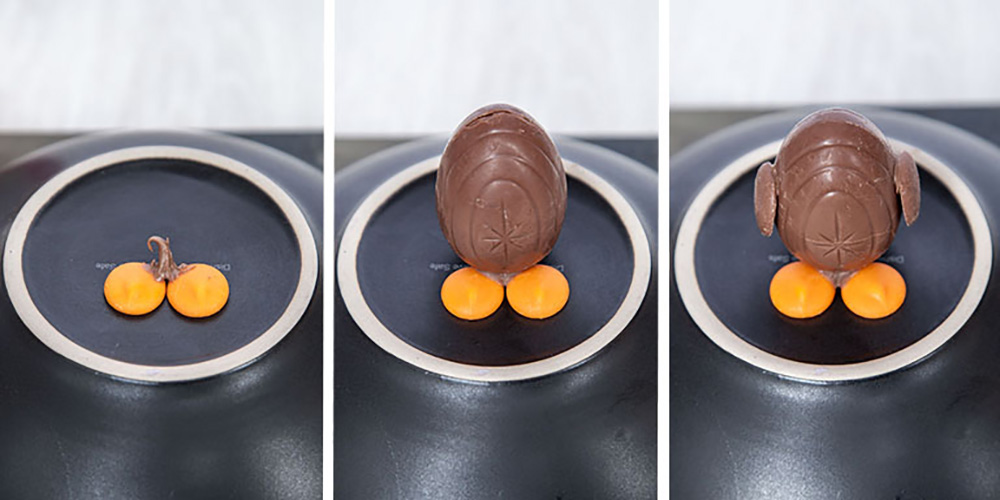
Here's how it's done... Step 1
Place two orange buttons side by side on an up-turned bowl with a flat base. Heat the milk chocolate in a small container in the microwave until it has just melted, then dot a small amount at the top where the buttons meet. Stand the chocolate egg on top of your chocolate blob, pointy end up and hold it in place gently until it can stand up on its own. It should take 15-20 seconds. If it takes longer, your chocolate glue is too hot, so stop for a few minutes until it has thickened.
Next, using the melted chocolate again, stick on one milk chocolate button either side of the egg to form the wings.
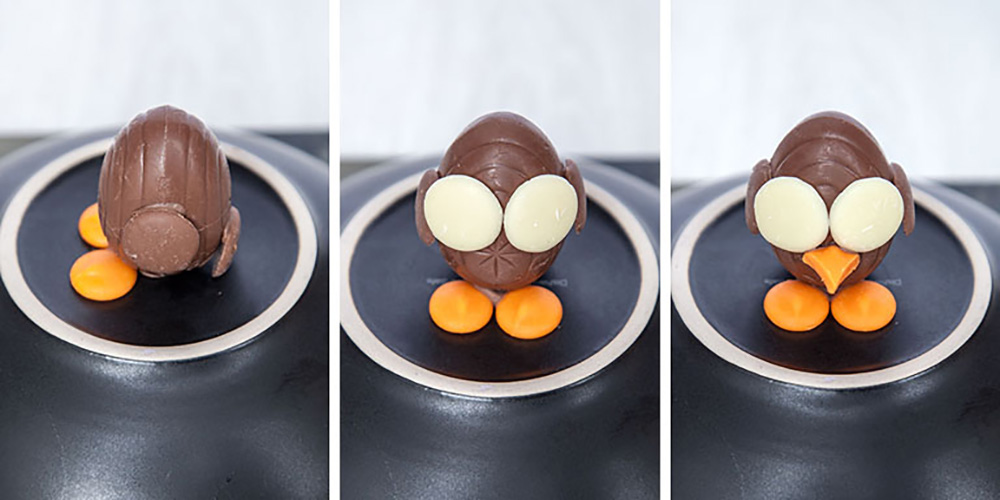
Step 2
Rotate the chick 90 degrees and stick another milk chocolate button towards the bottom to form a tail. Rotating back 90 degrees again, stick on two white chocolate buttons, roughly level with the wings to create the eyes. Next, use a sharp knife to cut an orange button into a triangle shape (this is a job for a grown up) and then stick that just below the white buttons to form the beak.
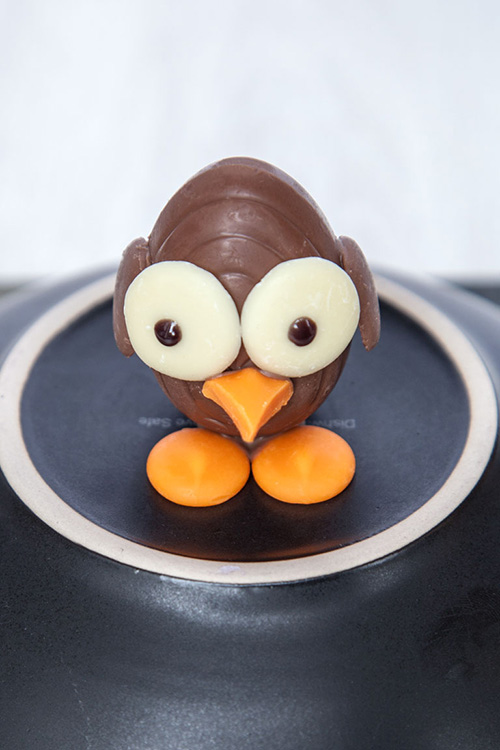
Step 3
To make the pupils, squeeze a blob of writing icing into the centre of each white chocolate button, then pat them with a slightly wet finger to flatten.
Step 4
Allow the chick to set completely for a few minutes, then turn the bowl the right way up and run a splash of warm water into it while gently pulling on the chick from underneath. It should release within a few seconds.
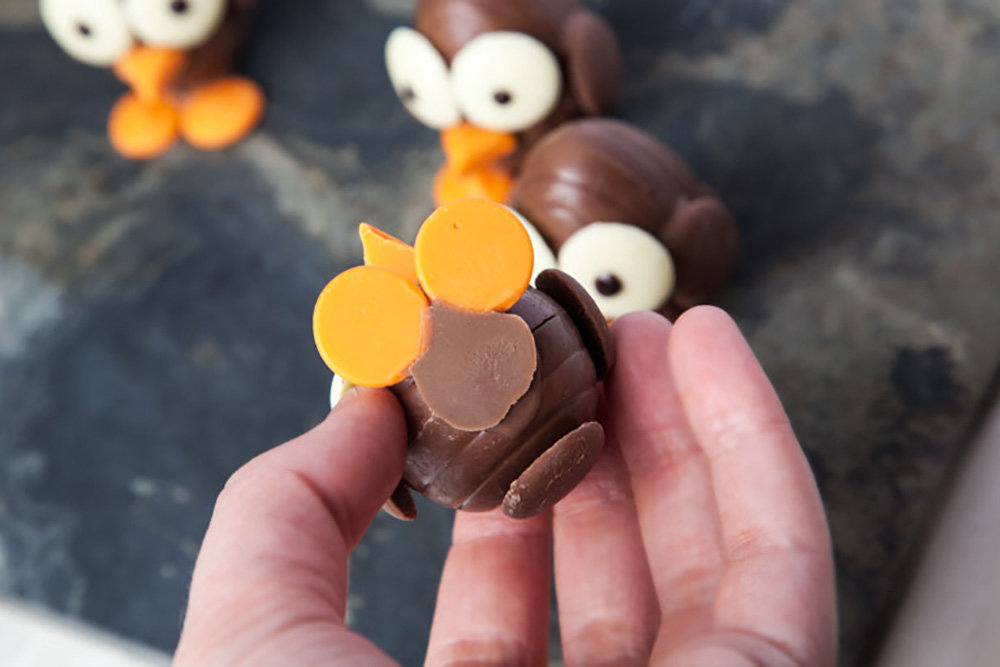
Step 5
Aren’t they fun? Once you’ve got the hang of one, you can just keep making them until you’ve got a complete set of chicks. If you’re feeling creative, each chick could have an orange button crest, a chocolate button top hat, or anything else you fancy.
Enjoy and Happy Easter!