Our site uses cookies to give you the best experience. or continue shopping if you're happy.
Accept & closeSkin Care: Make Your Own Soap
Make your own scented soap to wow your friends

While I’m always happy to get my hands dirty with a bit of DIY, I’ve never been much of a crafter. However, the more and more I’m exposed to the wonderful things bloggers are making, the more intrigued I become to have a go myself.
One of the things on my radar is soap making. It’s a trend that’s definitely picking up and there are some incredible recipes around, but when I heard about the dangers of using lye (wear goggles, wear long sleeves, don’t let your cats anywhere near anything while you do it, wear a radiation suit, take cover!) I admit I was scared off. That’s until I heard about melt and pour soap. It’s easy. And it’s safe. And you don’t have to wear goggles or radiation outfits, and if my cat wanders in, I’m not too bothered. The fact is, there are so many possibilities for making your own soap and this method really takes the hard (dangerous) part of out of it. I was sold.
So what I’m sharing with you today is my first adventure in soap making using melt and pour soup provided to us by our friends at Stephenson Personal Care, and I’m hoping it’s certainly not my last because making this stuff is seriously addictive. I’m already planning out all the gifts of soapy goodness I can give out come Christmastime.
Here's what you'll need...
Melt and Pour Soap Base
Soap moulds
Fragrance Oil
Surgical Spirit (aka Rubbing Alcohol; I purchased mine on Amazon but any pharmacy will have it)
A clean empty spray bottle
A large knife for cutting the soap base into cubes
A cutting board
A whisk
Thermometer (optional)
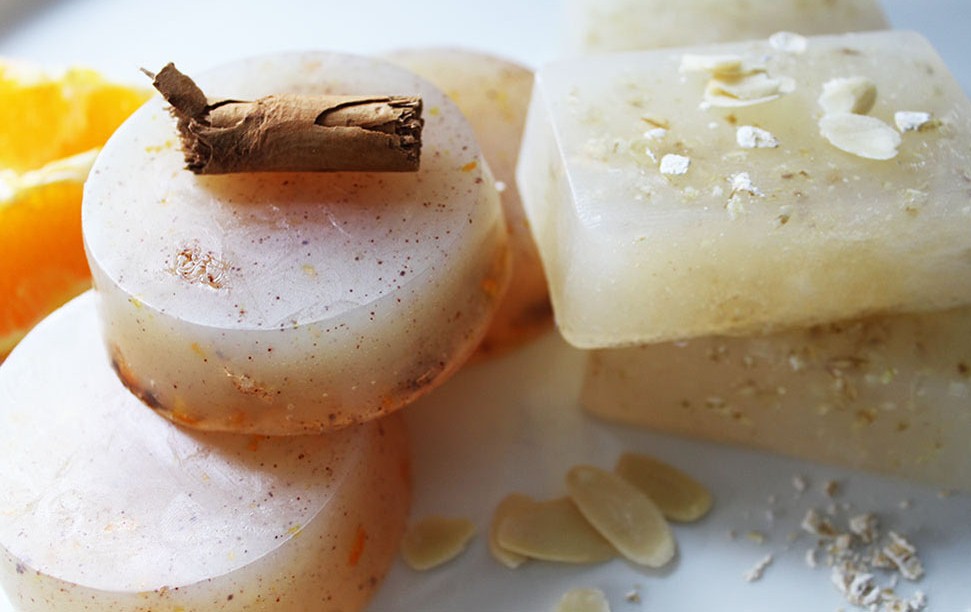
For the Cinnamon Orange Soap you’ll need to add:
Grated or finely chopped Orange Rind
Grated or ground Cinnamon (I started using the sticks but decided to just use Ground Cinnamon instead, either will work)
12 drops of Cinnamon & Orange Fragrance Oil (more or less to get either a subtle or strong fragrance)
For the Almond, Oat and Vanilla Soap you’ll need to add:
1 tsp Almond Flakes, ground
1 tsp Oats, ground
8 drops of Vanilla fragrance (more or less to get either a subtle or strong fragrance)
Here's how it's done...
First, prepare your ingredients. I ground both the almonds and the oatmeal quite finely to make the soap lightly exfoliating. I also grated my orange rind. Leave any pieces slightly larger for more exfoliation. The reason you want to prepare these ahead of time is because the soap solidifies fairly quickly, so you don’t want to be faffing around with your ingredients when you’re ready to put them into your melted base. Bear in mind, you’ll want to prepare each recipe separately but follow the same steps for each one.
Cut the soap base into pieces. You can see how many pieces you’ll need by approximating how many will fit into one of your moulds. For the square moulds, I used 8 squares to make 3 soaps and for the round soaps, I used 6 squares to make 3 soaps.
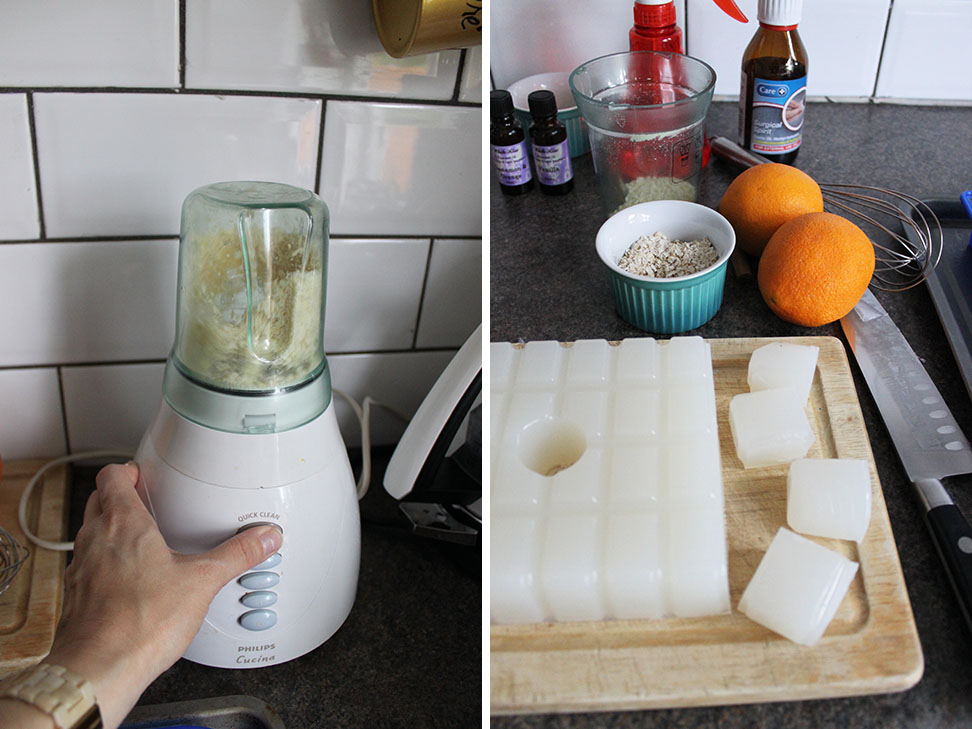
Using a glass bowl or pyrex measuring jug, melt your squares in the microwave. You can also use a bain-marie if you wish. If you’re putting it in the microwave, you’re actually supposed to cover it with plastic wrap. I totally forgot this bit (rookie mistake) but it seemed to be fine anyway. It took around 2-3 minutes but as all microwaves will vary, you want to be sure to check it around every 30 seconds or so and give it a stir with your whisk to break down any remaining pieces. Don’t stir too hard however as this will create air bubbles in your soap.
If there are a few little solid pieces still remaining, don’t worry, these will melt with a (slow) stir of your whisk.
Now you can begin adding your ingredients for either recipe. I played with the quantities a little but always start with less than you think you may need – you can always add more but you can’t take away! You can also add soap colouring at this stage if you wish – again, remember to use ones made just for soap making. I liked the natural look for these but it’s really a personal preference, anything goes!
Now, slowly stir in your ingredients (at around 75 degrees C if you’re using a thermometer) until the soap starts to get a little bit heavier (around 70-72 degrees C) and then transfer into your moulds. If there are air bubbles at the top of your liquid, spray lightly with surgical spirit to remove any remaining bubbles.

Now you can either leave them out for 2 -3 hours or pop it into the fridge for an hour. I’m impatient so I used the fridge method!
fter this time has passed, you want to make sure your moulds are completely cool before removing from the mould. They should simply pop out by flexing the mould a little. If they don’t, you can stick them into the freezer for a short time to loosen them! That’s it! You now have beautifully hand-crafted soap you can be proud to say you made yourself using natural ingredients.
If you want to give them as Christmas gifts, simply wrap in pretty printed paper or craft paper, label them and you’re all set!
You want to have a go now, don’t you? Of course you do. Well, hopefully we’ve made it really easy for you to do so.
